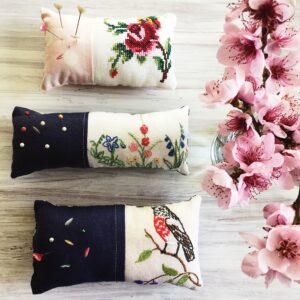
Like some women collect diamonds or fine china or shoes, I have a fondness for embroidery on linen or 100% cotton.
Little stitches carefully and meticulously hand sewn, the time and attention to detail. Beautiful and practical, I love finding different uses for it especially if otherwise it would be sitting in a cupboard from year to year. A pocket on a dress, a bread bag, a pincushion, all adding to our handmade home.
Pincushions.
A pin cushion is an essential part of the sewing kit.
It needs to be large enough to grab a pin with one hand and not lift off the table.
Pin cushions look pretty sitting on the shelf when not in use or can be packed neatly into your sewing basket.
When our daughter was six or seven to extend her interest in sewing I made up a little sewing kit for her. A hand made pin cushion, some pretty pins with love hearts on the ends, a packet of needles that were easily manageable for her small hands and some embroidery cotton in her favourite colours. Like any creative, a new kit is inspiring.
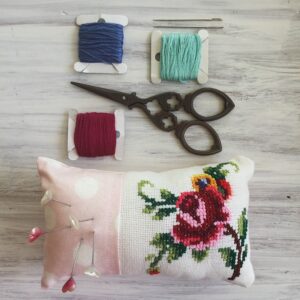
How to make a pincushion using some hand embroidered fabric.
Choosing the right embroidery:
Look for good quality linen not polyester.
Stitches should be even, not raised or loose.
Hand stitched embroidery or good quality machine stitching is preferable.
A tiny stain the size of a pin head can be easily covered with a few small stitches using the same colour cotton as the linen.
Stuffing:
Washed, clean, dry wool fleece is an environmentally friendly alternative to manufactured polyester stuffing.
The fleece we use for stuffing craft projects is stored in a cotton drawstring bag and bought at local markets.
Note: The size of your pin cushion will depend on the piece of embroidered linen you use.
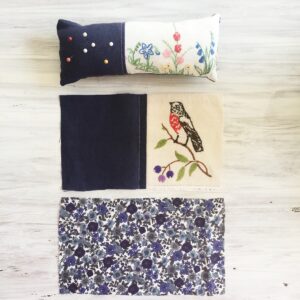
You will need:
3 pieces of fabric.
Front panel 1: is the embroidered piece.
Front panel 2: is the contrasting piece of fabric sewn next to the embroidery piece. (The blue fabric sewn next to the bird in the above picture.)
Back panel: needs to be the same size as the two front panels sewn together.
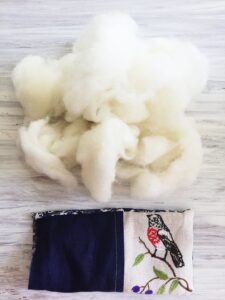
Wool fleece for stuffing.
Sewing needle to hand sew. Cotton to match your fabrics. Sewing machine. Scissors.
Method:
1. Sew front panel 1 and front panel 2 together with right sides facing. This is the front of your pincushion. (Optional: Stitch a row along the contrasting panel for decoration.)
2. With right sides together stitch the front panel you have just made to the back panel leaving one end open. To reinforce the stitching sew another row straight over your first row.
Turn your work to the right side ready to stuff.
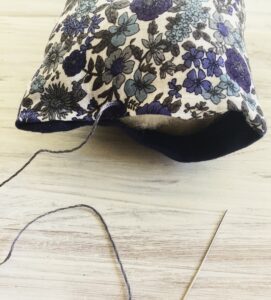
3. Stuff your pincushion. Not too full, but not too empty either, you don’t want a lumpy pincushion! As an indication the bird pincushion before stuffing and sewing in the end measured 20cm x 12cm, sewn 1cm from the edge, it took 26grams of wool stuffing. The narrow end of a chop stick is great to use for getting the stuffing up into the corners, using the end of a pair of scissors can puncture the fabric (just speaking from experience!)
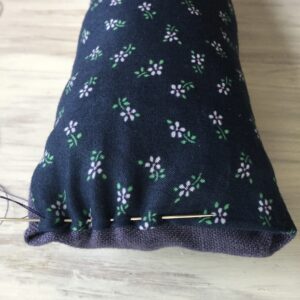
4. The open end is hand sewn using running stitch. Thread your sewing needle with a colour that matches your fabric, matching cotton camouflages uneven stitches & makes your work look neater! Turn the fabric on the front side of your pincushion over approximately 7mm in towards the stuffing and turn the fabric from the back piece in approximately 4mm towards the stuffing. Pushing the front & back together sew them together using running stitch, picking up the front piece of fabric without the stitches appearing on the front of the pincushion. You could pin the front & back together once in place, I tend to just hold it in place as I hand sew, the cotton can get tangled with the pin. Can you see in the photo that the stitching appears on the back of the pincushion not on the edge, sewing it like this gives a neater finish hiding the hand stitching from view.
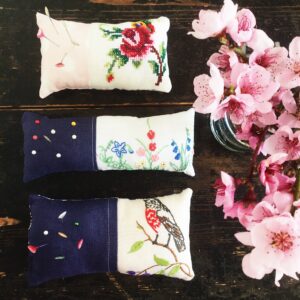
I wonder who created the embroidery. Where they sat, how long it took them, what their everyday lives looked like, what they were thinking about as they pulled the needle and thread through the fabric, the quiet contemplation, why they chose the embroidery cotton colours, was it for a gift or for them creating something decorative for their own home or for their glory box, were they dreaming of their future?
Mindfully I thank the person as I craft something new from something that was crafted in their own hands.
Until tomorrow, sending light and love.
Jude x
If you haven’t caught up, the latest monthly newsletter, Fairy Wren Cottage Postcards is here
And the Interview Series is here
Pin Cushion Tutorial: Repurposing Embroidery.
June 22, 2023
comments
share