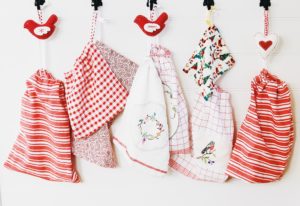
These bags are a great alternative to wrapping paper. They also make great bread bags to store your homemade loaf in or to take to the shop when you buy a loaf instead of using a paper bag or plastic bag. There are so many uses: handy to put kitchen supplies in when camping, they make a good book bag, a craft project bag or to put toys in when you are out and about. The best thing is they are easy to wash and dry for reuse.
Collecting your materials:
Fabric:
Look for fabrics that are 100% cotton, 100% linen or a mix of cotton and linen. Think tea towels, fabric offcuts, salvaging a tablecloth that has a stain up one end but the rest of the fabric is in good condition. Even chopping up a table cloth, pillow slips or sheets that don’t get used from year to year and are in very good condition, if they are just sitting in the cupboard and can be put to better use, why not? It saves money on buying more fabric and the time it takes to drive to a fabric shop battling traffic, parking the car, paying for the petrol and possibly parking fees, then lining up in the shop waiting to be served, you could be home already making the bags and have the rest of the day to do something else.
When I have sorted through my stash cupboard and decided on fabric I wash & dry it again, checking to make sure it passes the all clean test.
If I am using a shop bought tea towel I wash and dry it by itself a couple of times, sometimes the colour can run and I would rather find out sooner rather than later when it has been washed with the rest of the bags! I sometimes hang things on the washing line for a few days to air and to get rid of that ‘new’ smell.
A fabric bread bag at the health food shop last week was $21.99. This bag cost $2 for the tea towel,$1.50 for the doily, $1.50 for a metre of cotton tape. Total cost: $5. the cotton thread I already had for another project.
Doilies:
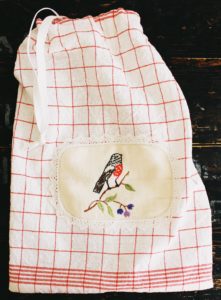
If you aren’t using a doily that you already have look for doilies made from linen, cotton or a mix of both. If you aren’t sure what the fabric is made of gently rub the doily between your index finger & thumb polyester feels slippery. Op shops (thrift shops) and etsy.com are good places to source doilies/vintage linen.
Check that the stitches on the doily are neat and well fastened and any edging isn’t fraying or can quickly be repaired. Fragile stitching or lace work won’t be durable long term unless you hand wash each item individually and lay the bag flat to dry it.
Draw string:
Ribbon or cotton tape. During the year if I am at the fabric shop or ordering online I stock up, it is always handy to have in your sewing box and saves an extra trip to the fabric shop when you actually need it. The same goes for buying spools of cotton.
You will also need: Cotton to match the fabric (it hides stitching errors well!) a large safety pin for threading the ribbon, scissors, a sewing machine.
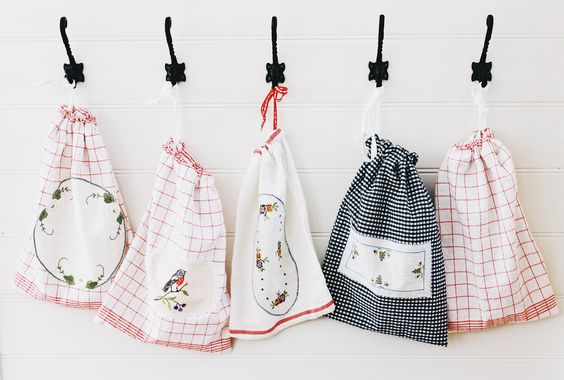
How to make a drawstring bag from a tea towel.
These bags are made by folding a tea towel in half, the tea towel is already neatly edged so no frayed seams and extra sewing.

See on the left where the measuring tape sits & reads zero? I anticipate sewing the side seam there just near the edge. Then by measuring from zero to 31cm I can calculate where the centre of the tea towel will be once the side seam is in place. This is how I work out where to centre the doily width wise.
- With wrong sides together position & pin your favourite doily on what will be the front of the bag. Keep in mind the spacing for a side seam, bottom seam and you will be folding down the top 5cm to make a channel that you will thread ribbon through to make the drawstring closure. Machine or hand sew the doily on making sure you don’t sew the front & back together!
- With the doily sewn into place, fold your tea towel with right sides together, matching up the edges, sew a side seam and bottom seam.
- Now to make the enclosed channel that you thread your ribbon through to create the drawstring closure. Still with right sides together fold the top of the tea towel down approx. 5cm. Sew along the edge leaving a 4cm gap to thread your ribbon. The drawstring enclosure works best if you leave the 3cm gap (the opening for threading the ribbon) at the back on the right hand side.
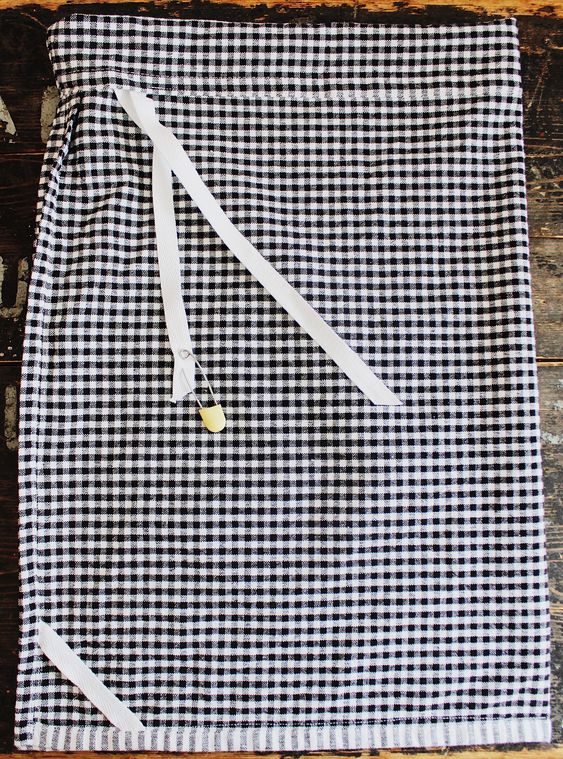
- Thread your ribbon through the channel by attaching a large safety pin, see the photo above. Trim the ribbon edges to prevent fraying, knot your ribbon close to the end.
- Turn your bag right side out.
- That’s it! Done! you now have a handy bag.
Let me know if you make some I’d love to see them.
Jude x
Drawstring Bag Tutorial
December 4, 2018

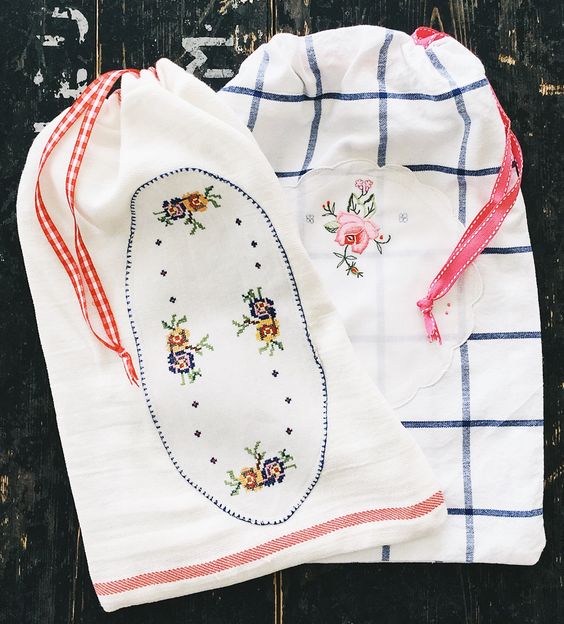
[…] If you would like a simple Christmas wrapping alternative I have created a very very easy tutorial for you. Both these tea towels are from IKEA, the top one is linen and from memory was in a pack of 2 for under $10. The bottom tea towel is cotton and only a couple of dollars at the most. The cloth tape was from packaging that we washed and repurposed. The hand embroidered linen doily was a couple of dollars at an op shop (thrift shop). The link for the tutorial is HERE […]
[…] The tutorial for these bags is HERE […]