A little craft for the soul.
A portable project to do in your lunch hour, or while waiting in the car.
Reduce Reuse Recycling.
A rainy day project to help encourage & practice sewing skills.
A sweet gift, easy to send in the post.
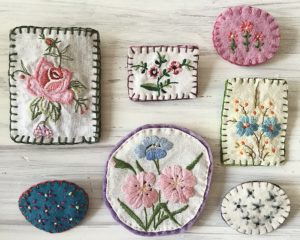
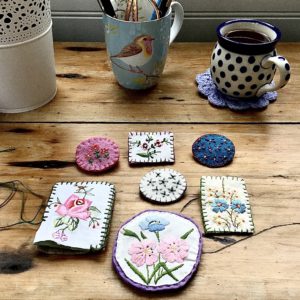
These felt brooches cheer up any outfit especially during the colder months when nothing much seems to be flowering in the garden and everything is starting to look a little grey! A little posy of flowers for the lapel, for the cardigan worn when working in the garden, doing outside jobs, tending to the ducks and hens, or pinned to the winter coat or shawl when heading into town for the day.
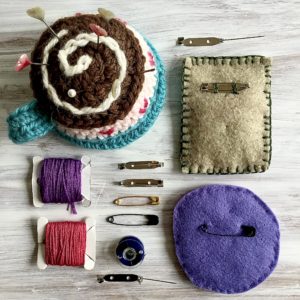
What crafts supplies are needed to make a Felt Brooch.
Felt:
We use the felt off cuts from bigger projects. The scrap felt bits and pieces are in odd shapes and sizes but just too good to throw away.
Embroidered Linen:
Little pieces of embroidery are cut out and saved when stains make an embroidered linen napkin, shirt or tablecloth unusable. Embroidered Irish Linen no matter how small seems too good to throw away.
When op shopping I keep an eye out for lovely embroidered linen that is stained and sold cheaply. When I say stains it’s refering to a spot here or there or a stain that is very small, nothing that looks large and dubious! I chop off the stained bit and use the embroidered bit.
Fasteners:
A small safety pin can be used to pin your brooch to clothing or you can purchase small brooch pin backs at sewing or craft shops – they are a more permanent solution that can be hand stitched to the back of the brooch.
Top tip – you can sew your brooch pin on to the back piece of felt first, before sewing the front of the brooch to the back of the brooch if it is easier for you.
If sewing on a small brooch pin back, test trial where it would sit best making sure when it is sewn on it doesn’t hang over the edges and can be seen. I generally place them in the top quarter of the brooch. Measure twice, sew once saves on unpicking mistakes!
Who knew there were so many names for that little fastening pin thingy!
Brooch pin back, pin back, bar pin, brooch back, brooch finding: all different names given to the small purpose made pin you buy that is sewn onto the back of a brooch to enable you to pin the brooch safely to clothing.
Thread:
Embroidery thread (or floss as it is sometimes called). Keep in mind favourite colour combinations when mixing and matching thread. Will it contrast well? Will it match my coat or cardigan? Do I absolutely love it? Like really love it? If not, I probably won’t end up wearing the brooch.
I use embroidery thread to sew the small brooch pin back on to the back of the felt. It is thicker than all purpose sewing thread there for using less stitches to keep the brooch pin back firmly in place. I also use embroidery thread for blanket stitch or running stitch around the border and decorative embroidery.
Embroidery thread is usually made up of several individual threads, I usually split the combined threads using only three of the individual threads, it’s less bulky and generally sits better on such a small project.
The only time I don’t use embroidery thread is when I use all purpose sewing thread in the same colour as the linen, used when folding the edge of the linen under to prevent fraying edges at the same time as sewing the linen to the felt. See above photo.
Embroidery needle and small scissors:
There are different sewing needles for different uses and it’s good to have a variety in your sewing box for different sewing projects and mending. Use a needle that gildes through the fabric and felt with ease and doesn’t leave large puncture marks.
A small pair of scissors specifically for sewing projects. The blades of the scissors become blunt if used on paper and if used for cutting sticky tape the adhesive sticks to the blades.
Size & Shape of the brooch:
Matching the size of small pieces of felt to the embroidery cut offs I have is usually how I determine what size the brooch will be.
*Important always leave approximately 0.5cm border between the embroidery and the edge of your linen or felt to allow for blanket stitch or running stitch edging.
Keep in mind favourite colour combinations when mixing and matching felt, thread and embroidery.
If you already have a brooch you like you could trace the outline to use as a guideline. It doesn’t have to be perfectly shaped, bespoke is charming.
5cm x 3.7cm is a good size brooch and not too big, (or if you can you could use an Australian fifty cent piece as a guide).

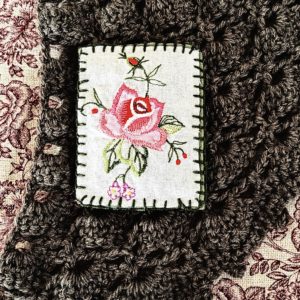
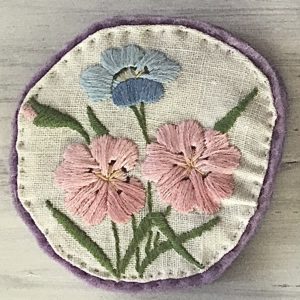
How to make a brooch using a small piece of embroidered linen for the front and a scrap piece of felt for the back:
1. Cut your embroidered linen the same size as the piece of felt you are using for the back of the brooch.
2. Place wrong sides together (the right side of the embroidery will be on the outside facing you when you hold your work) while holding the embroidery and felt neatly together, blanket stitch around the outside. Keep your stitches as even as possible, work slowly as not to fray the edges of the linen. Sign off.
3. Turn your brooch over and either attach a safety pin or a small brooch pin back being careful that the stitches don’t show on the front of the brooch.
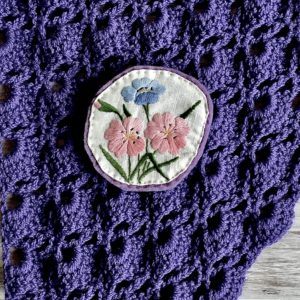
How to make a brooch using embroidered linen and two pieces of felt:
1. Cut your embroidered linen the same size as the two pieces of felt you are using for the brooch.
2. Use all purpose sewing thread the same colour as the linen, create tiny running stitches that sew the embroidered linen onto one piece of felt, carefully tucking the edges of the linen under to prevent fraying. The back of the felt you sewed the embroidered linen onto will now look a little messy. Sew the 2nd piece of felt you cut out to the first piece using running or blanket stitch covering up those messy stitches. Attached a safety pin or small brooch pin to the back. See above photo for example of finished brooch.
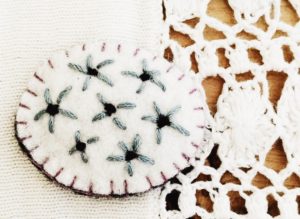
How to make a brooch using your own embroidery design.
1. Cut out two pieces of felt the same size, one for the front and one for the back of the brooch.
2. For the front, embroider your design using embroidered thread. But before you begin you may like to draw a rough sketch of your design on a piece of paper the same size as the brooch you are making, include how big you intend the embroidery and the stitches around the edge of the brooch to be.
3. With wrong sides together and while holding the two pieces of felt together neatly sew blanket stitch or running stitch around the edge.
These little brooches could be a great holiday project for people of all ages who love craft projects. When Lil was younger and learning crafting skills we would have craft afternoons, working on separate projects but I was close by to supervise and help when needed. My hand injury stops me from making something like this in one sitting, I break the little tasks up and do a few stitches at a time. I have always loved using my hands to create and don’t want my hand injury to define me, for me it’s all about breaking biggers tasks down into smaller doable steps.
Let me know if you make one, I’d love to see a photo of it.
Sending love,
Jude x
How to make Felt Brooches
December 17, 2022

comments
share